

Notebook#
Using the tool - notebook, occurs when you click on the “Notebook” button, located in the tools tab in the “Common” section.
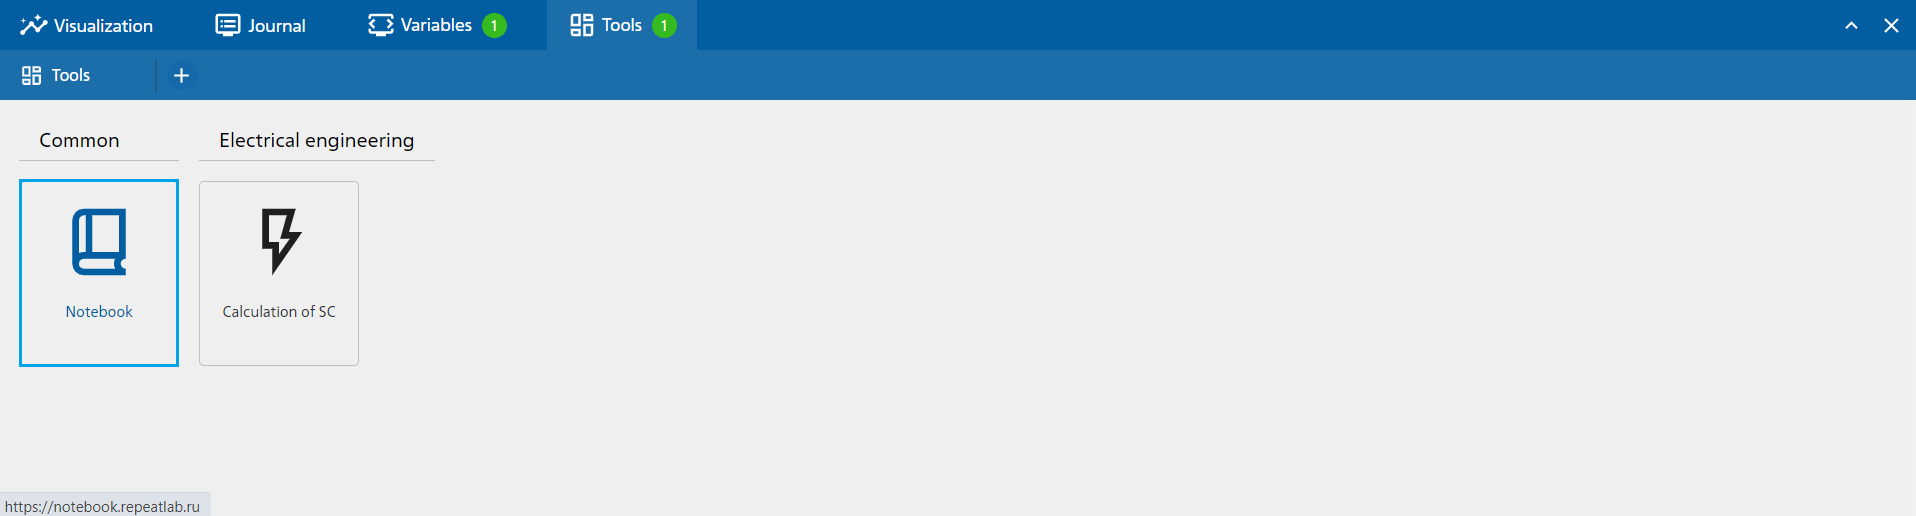
Fig. 1 Notebook
The notebook tool is a complete analogue of Jupyter Notebook - a notebook program for writing, transferring and running code. It can be used as a kind of development framework. It exists as a web service, that is, it is available via the Internet and allows to move code to other developers.
This is an interactive program that allows to run individual sections and blocks of code, execute them in any order. And work results can be immediately displayed in the same window next to the code.
For what the «Notebook» tool is used for:
Write code in a special environment with syntax highlighting, error correction and other IDE capabilities.
Start different sections of code in an arbitrary sequence or the entire written program.
Load some data, process and convert it without affecting other parts of the program.
Enter and display results, including visualization, right in the middle of the code.
Share code with other developers and share the project with them.
Organize teamwork when each programmer has his own task related to others.
Write the accompanying text and draw up the “document” so that it looks beautiful and understandable.
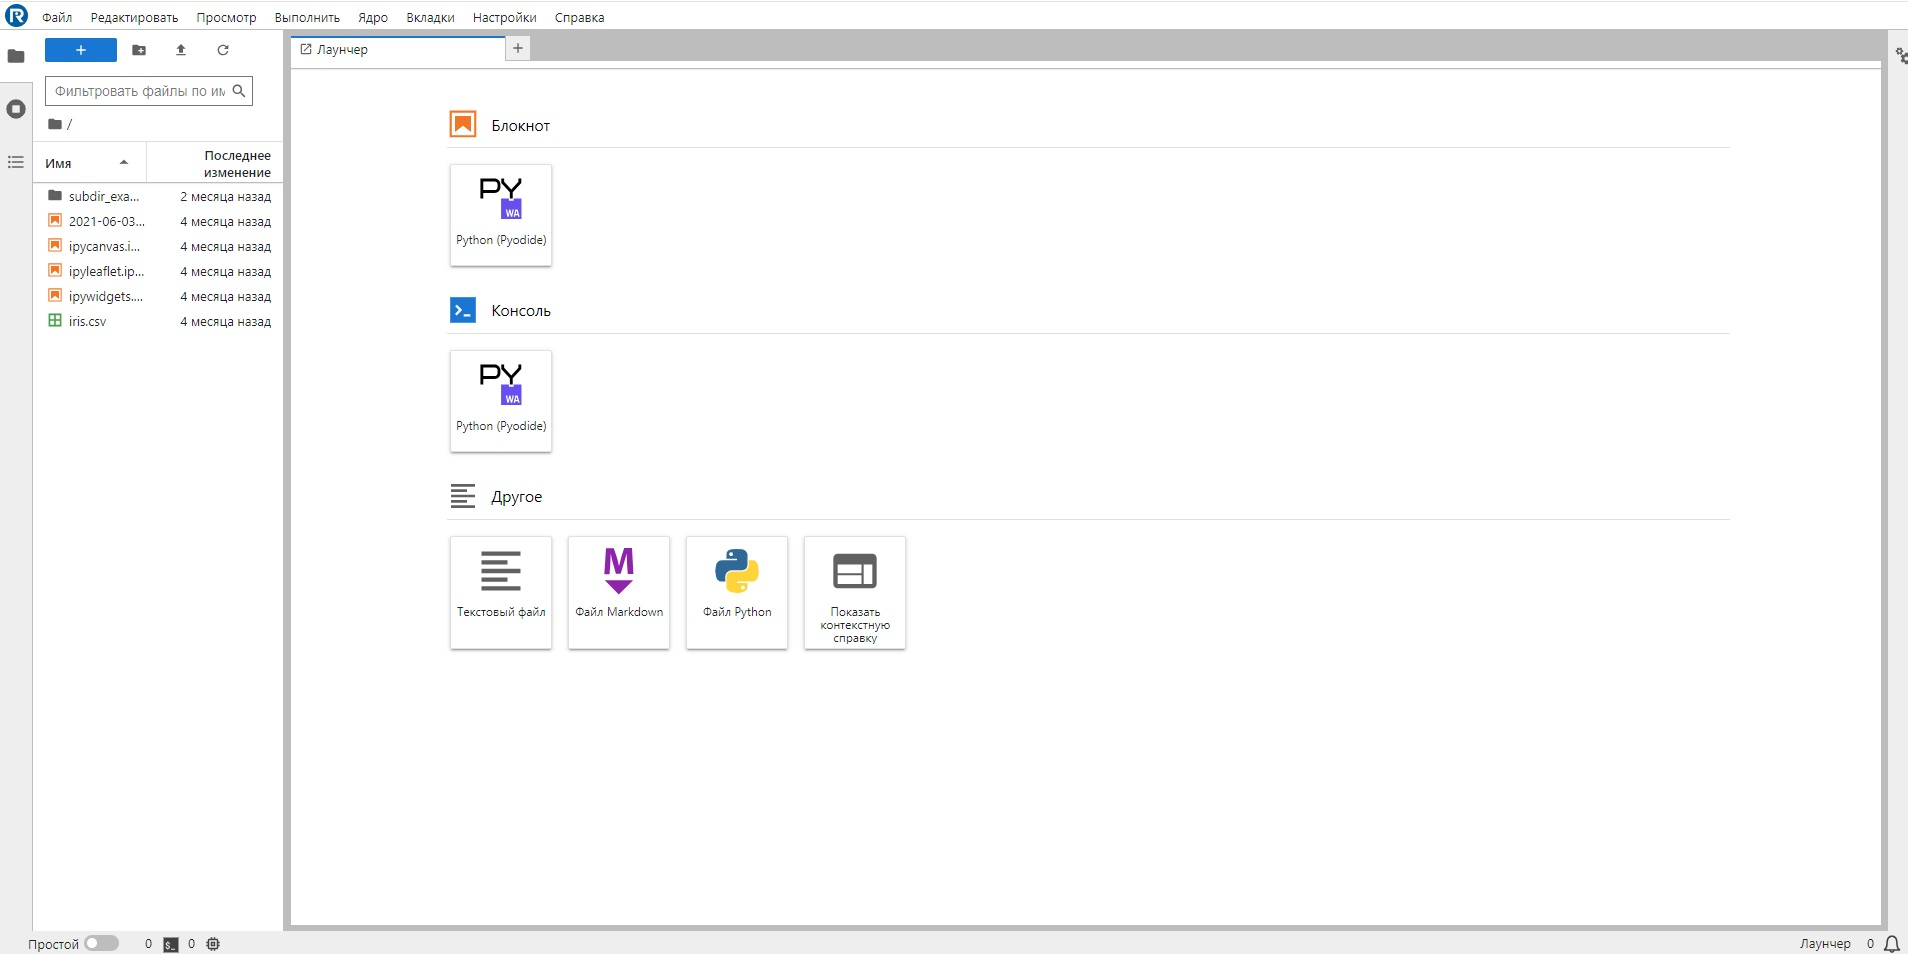
Fig. 2 “Notebook” tool interface
Example of description of analysis, code recording and drawing graphs using the “Notebook” tool
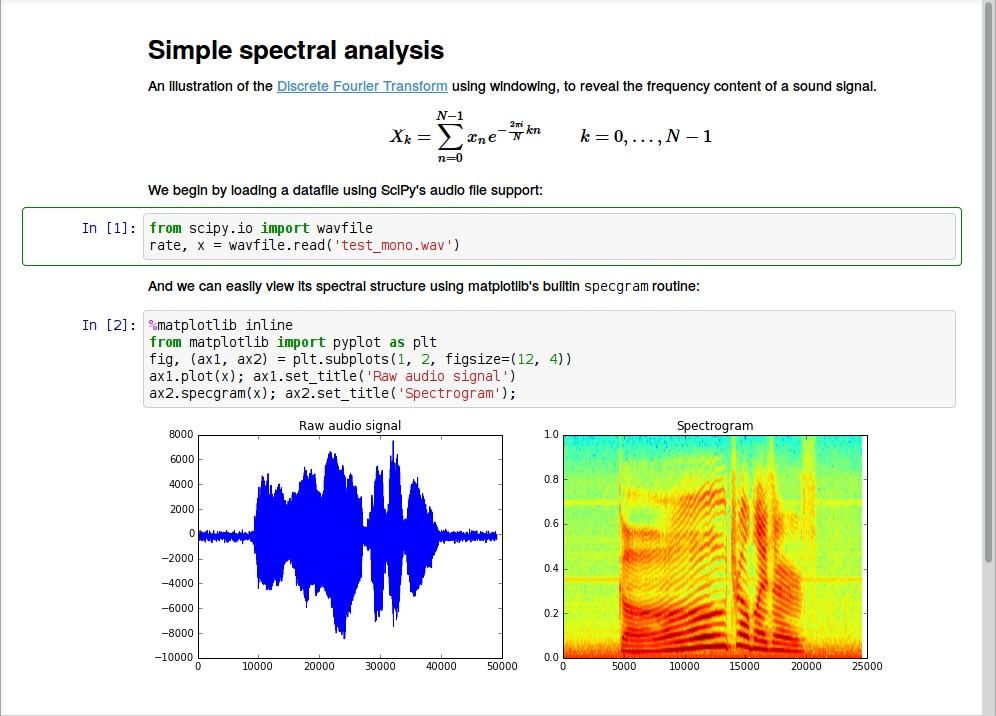
Fig. 3 Example of recording using “Notebook” tool
A detailed description of Jupyter documentation is also available in the «Help panel».
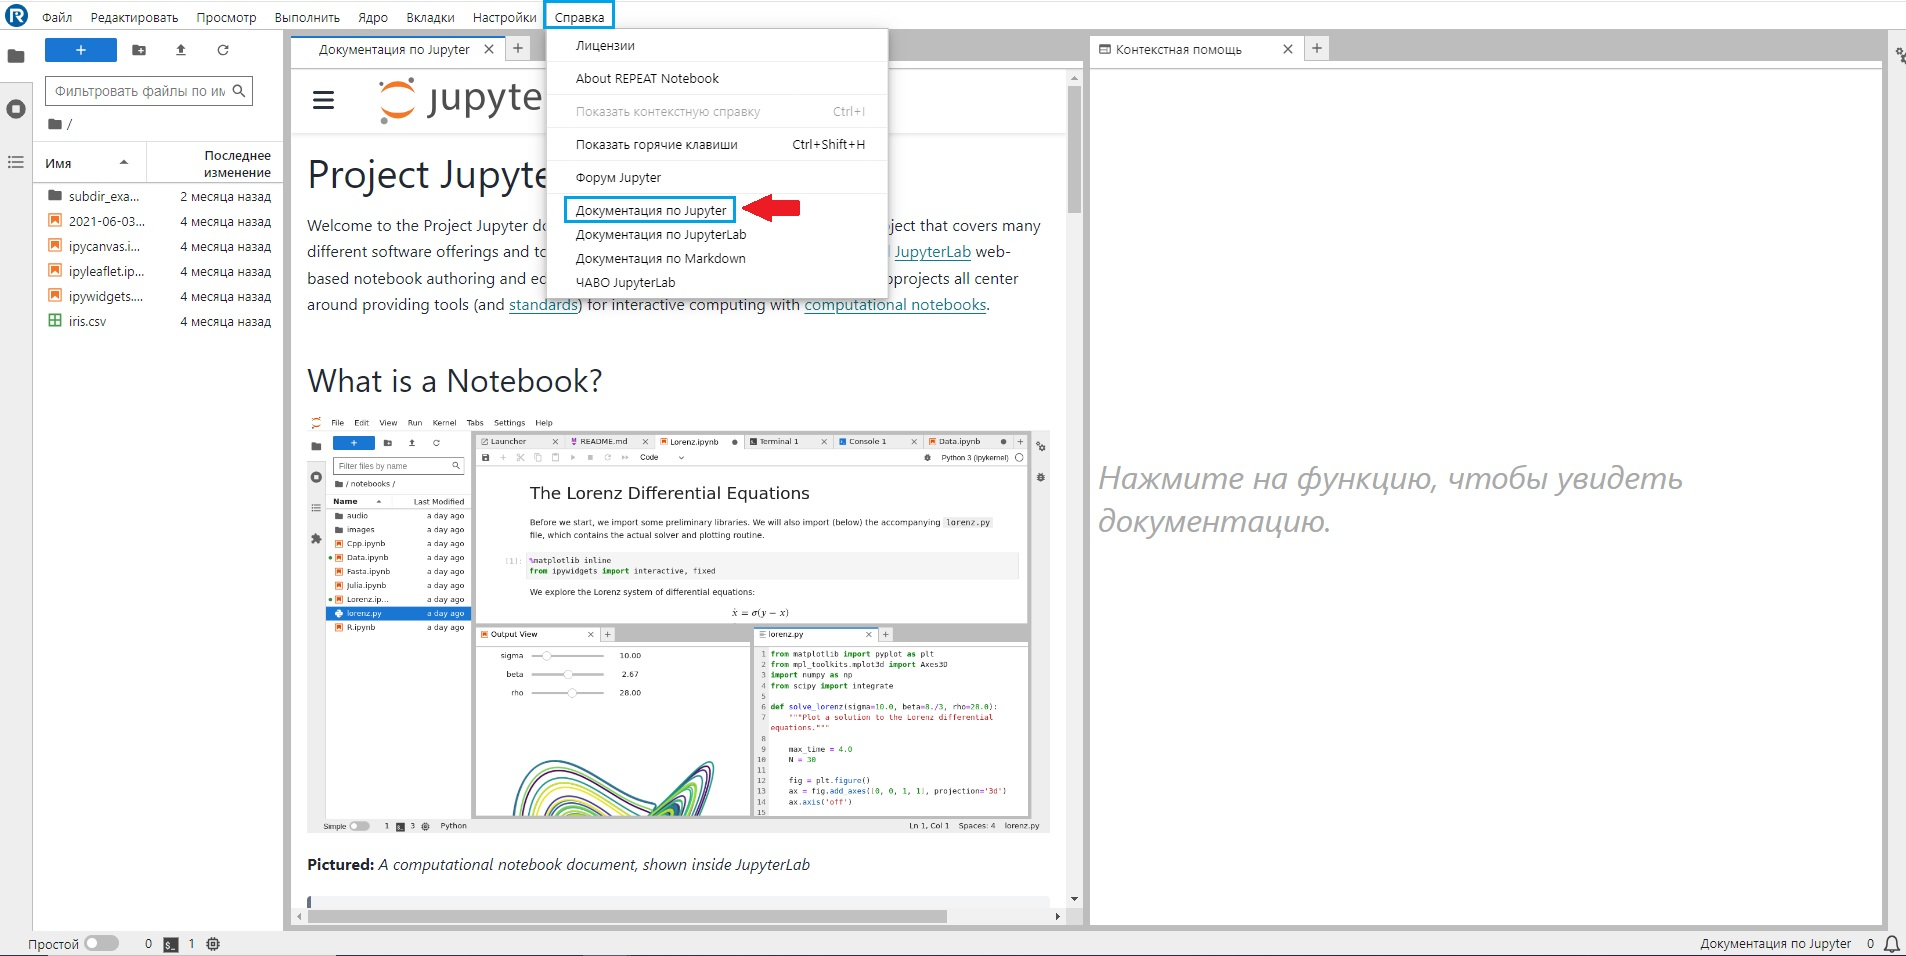
Fig. 4 Jupyter documentation
Note
JupyterLite supports the Markdown text markup language, which allows specifying expressions in TeX or LaTeX format. For this purpose, select the cell with the expression and select its format as shown in the screenshot below:
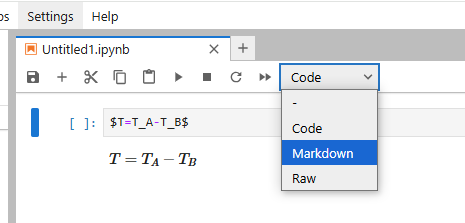
Fig. 5 Markdown usage example#
The screenshot above also shows the expression entry (in the first cell) and its display when starting a cell in Markdown format (second cell).
Note
JupyterLite allows displaying pictures in notepad, for this purpose one needs to import Image and display modules from the IPython.display library. Then load the image into the list of files, copy the path to it and display it with the display command display(Image(filename=’data/repeat1.png’)), where ‘data/repeat1.png’’ is the copied path to the image.
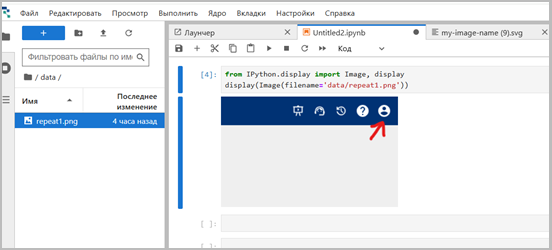
Fig. 6 Example of displaying pictures in notepad#
Limitations
Important
It is not possible to upload files locally if the conditions are not met:
see supported browsers;
Private Browsing in Firefox is known to not work
the HTTP server’s URL starts with one of:
https://;http://127.0.0.1:{*}/(any port);http://localhost:{*}/(any port).