

Multi-user work#
The multi-user work provides opportunities for team collaboration on projects. You and your colleagues can work on the same models, scripts, and datasets, eliminating the confusion of duplicate files and eliminating the need to manually merge versions.
To use this function you need to:
While in the
Projectstab, select the project you want to share by RMB on it;In the opened window
Access to fileyou need to (see Fig. 2 below):
Enter the email of the user with whom you want to share the project;
Note
The user you want to grant access to the project must be registered on the REPEAT VISION platform
Select the access level for your file based on table 1:
Name of access right |
Description |
|---|---|
View |
View only the project ( |
Full access |
The ability to edit a file and then save it |
Important
Only the project owner or a user with Full access can share a project.
Click the Invite button.
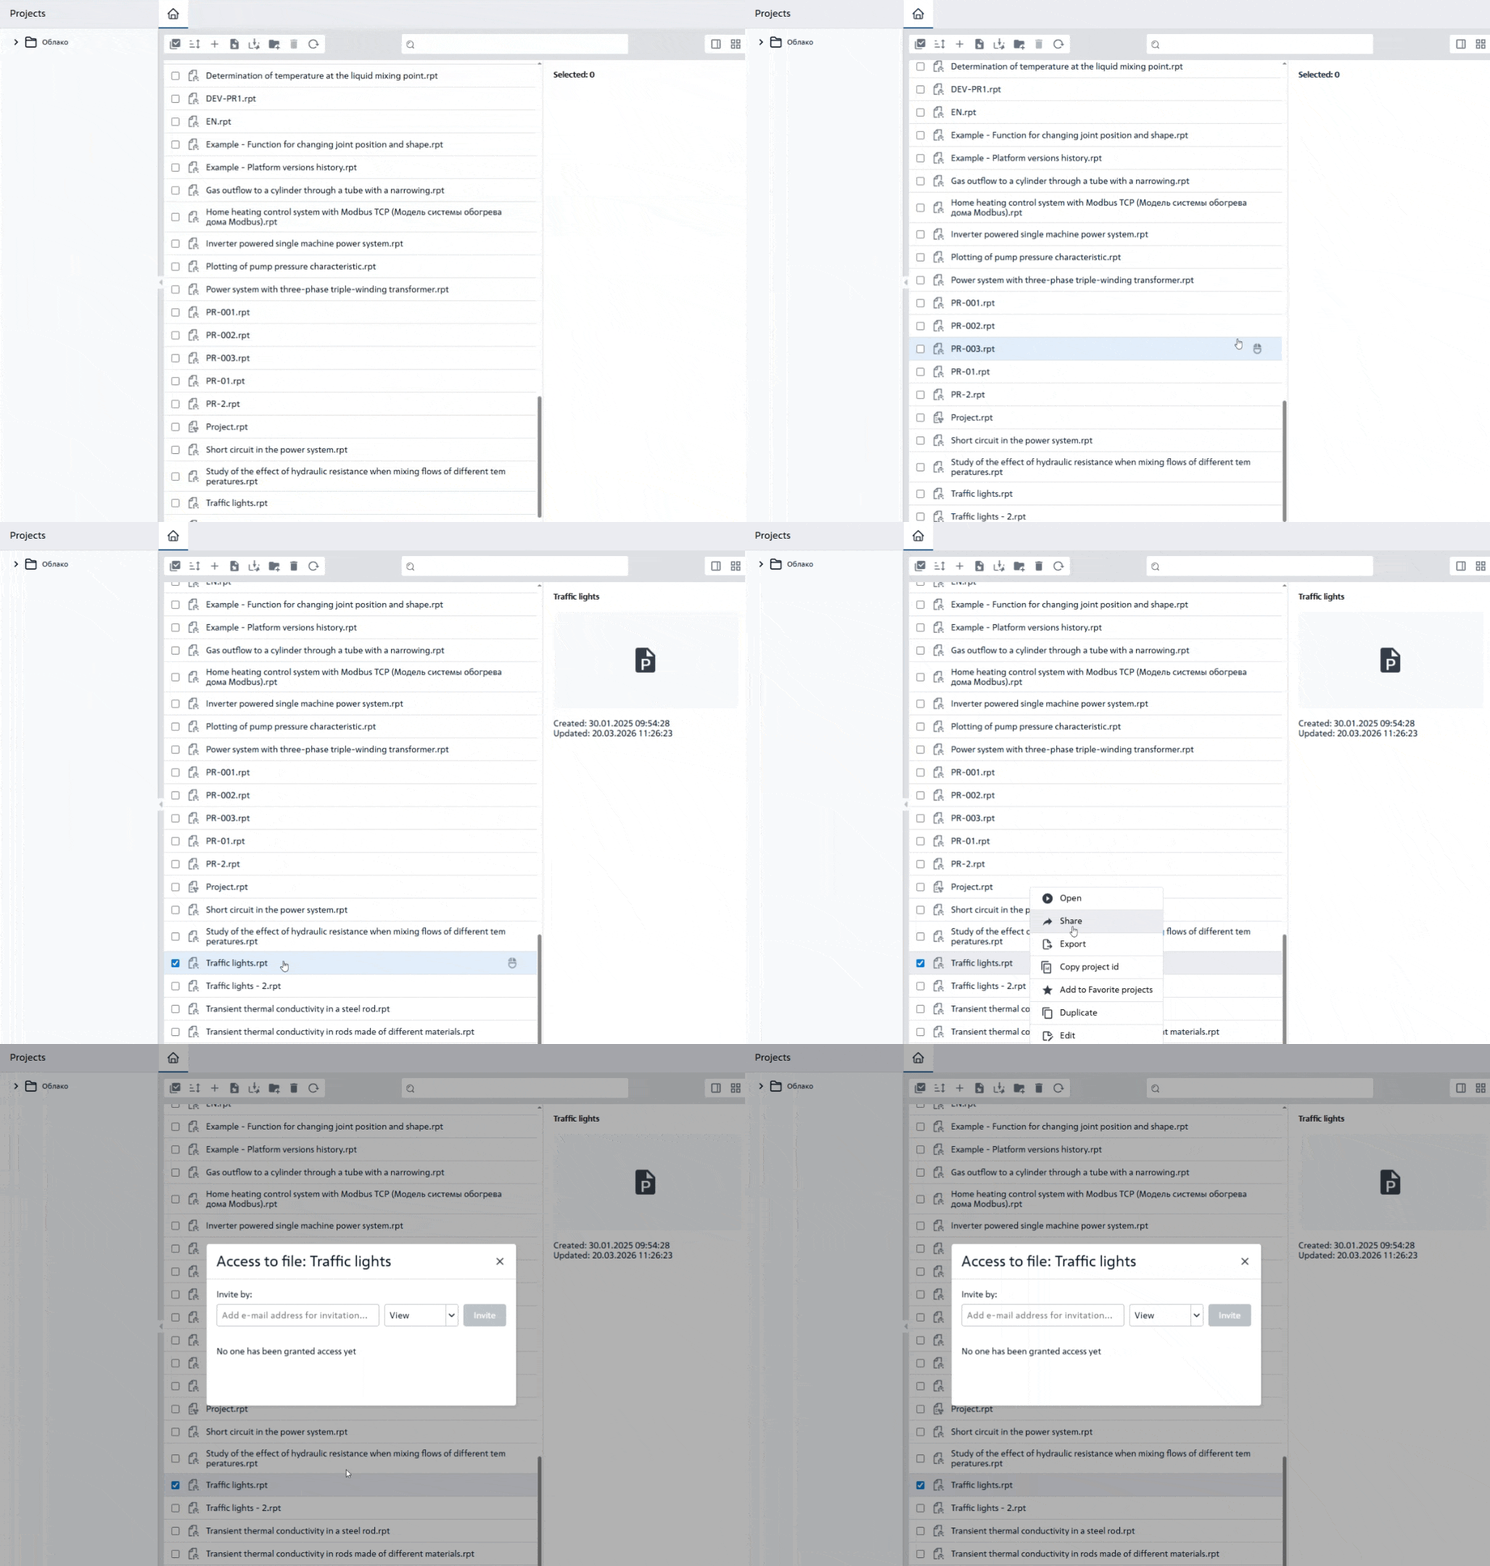
Fig. 1 Share project#
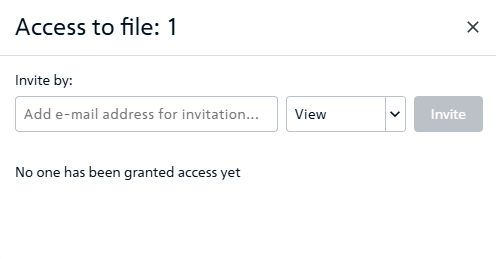
Fig. 2 File access window#
After granting access to the selected project, a list of user emails and their access rights to it appears in the file access window, Fig. 3:
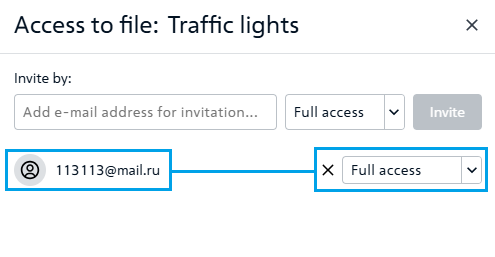
Fig. 3 List of users with rights to the project#
You can also manage the list of users with granted access rights to the project:
Delete users, taking away their access to the project, by clicking on the button
 to the left of the selected user access type;
Note
Only the project owner or a user with full access can remove users from the list;
The project owner cannot be excluded from the access list.
Change the access type to a project from the list that opens when you click on the line with the specified access rights.
Note
When you click on the button a window appears (see Fig. 4 below) in which you must select the desired action:
Cancel if removing the user from the access list is not required;
Delete if you need to confirm the removal of a user from the access list.
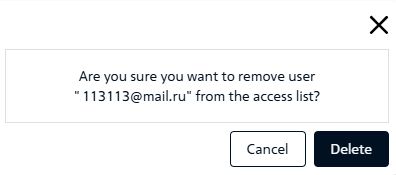
Fig. 4 Window for deleting a user from the access list#
After a user has granted access to a project or has been granted shared access, a shared access icon appears in the project tree next to the name of the user who has granted access to their project/projects, Fig. 5:
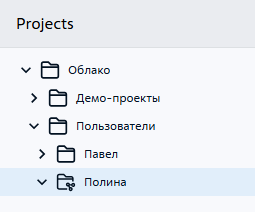
Fig. 5 Share icon#
When you go to the shared projects folder, you can see icons with access rights levels (see Fig. 6 below):
 - full access;
 - view.
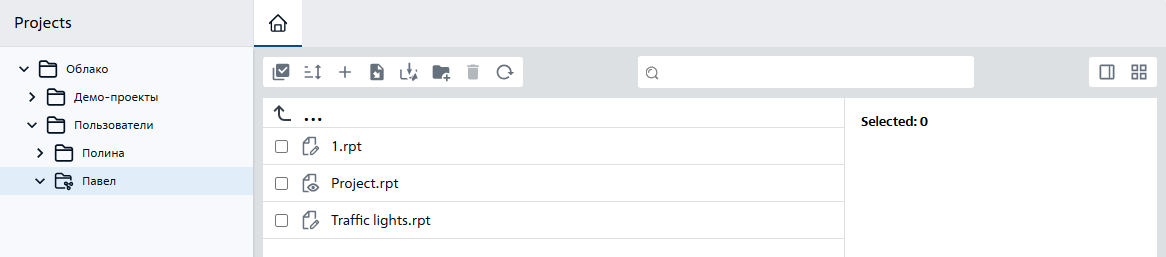
Fig. 6 Access rights to projects#
Important
To prevent multiple users from accidentally editing the same project simultaneously, the system has a simple and clear rule: only one person can edit a project at a time.
What this looks like in practice:
The user opens a project and begins working – the system “locks” it for others.
If another user tries to access the same project, they will see the message: “The project is being edited by [Your Name], please try again later.”
Once the editor leaves the project, the lock is removed and another user can start editing.